Vendor Guide
To become a seller on the Leafcon Agro portal, you need to follow few simple steps. This guide will help you to understand how to get registered and how to sell your products on our portal.
How to register with us?
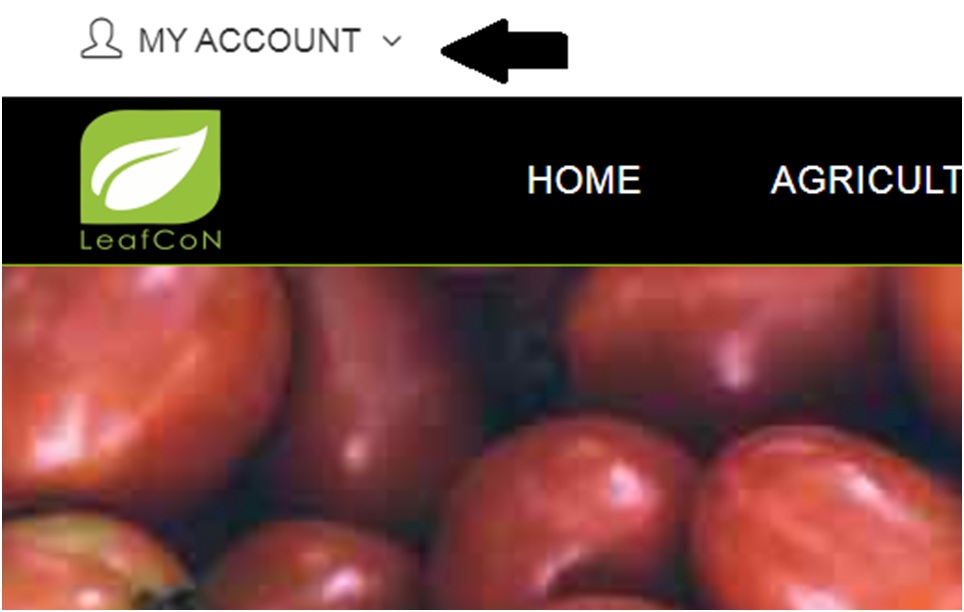
- To get registered with us all you need to do is click on “MY ACCOUNT”
- Once you click on that you will be visited by this page for “LOGIN OR REGISTRATION”.
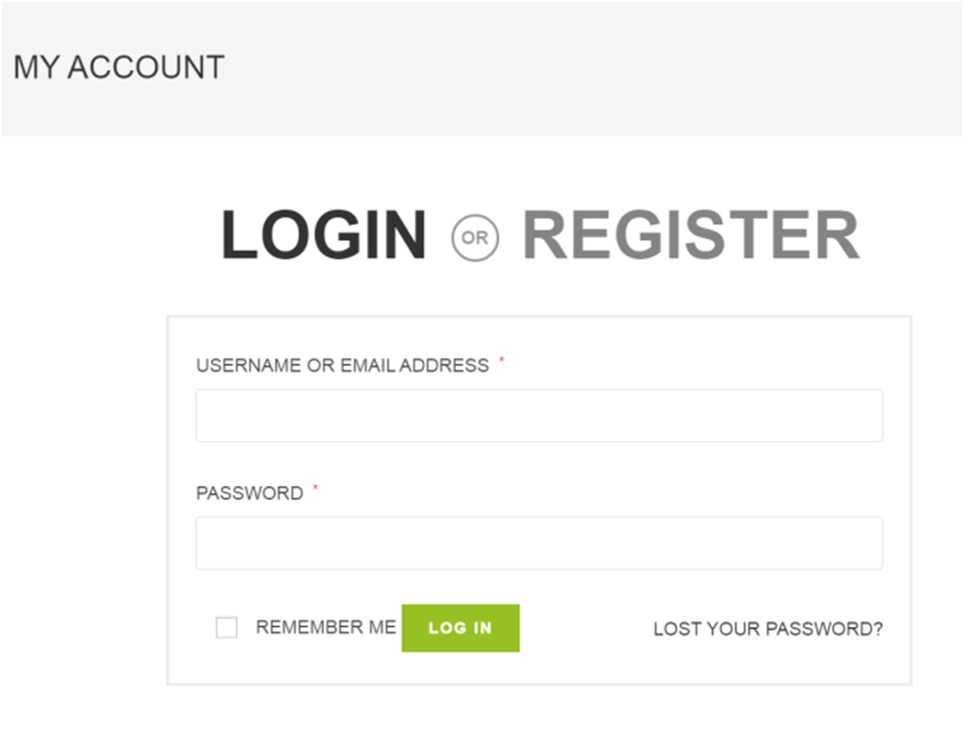
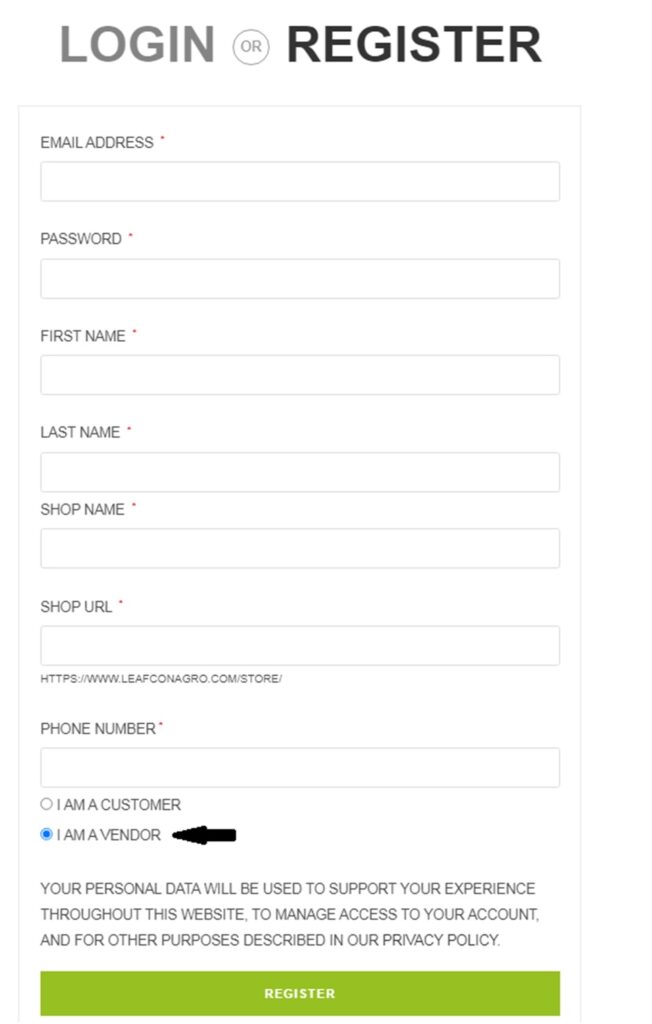
- Simply start typing your USERNAME OR EMAIL ADDRESS and your PASSWORD. Please make sure that you select the “I AM A VENDOR” option.
- After clicking on the registration button, you will be redirected to a page like below,
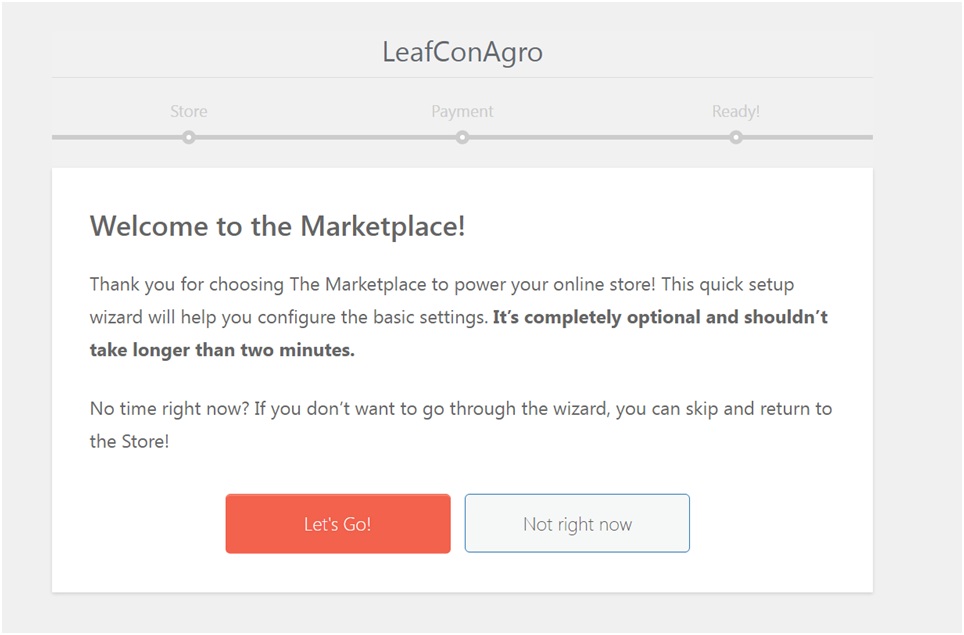
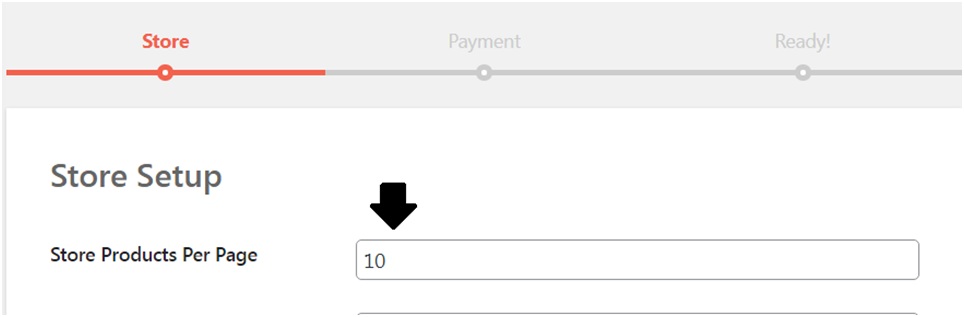
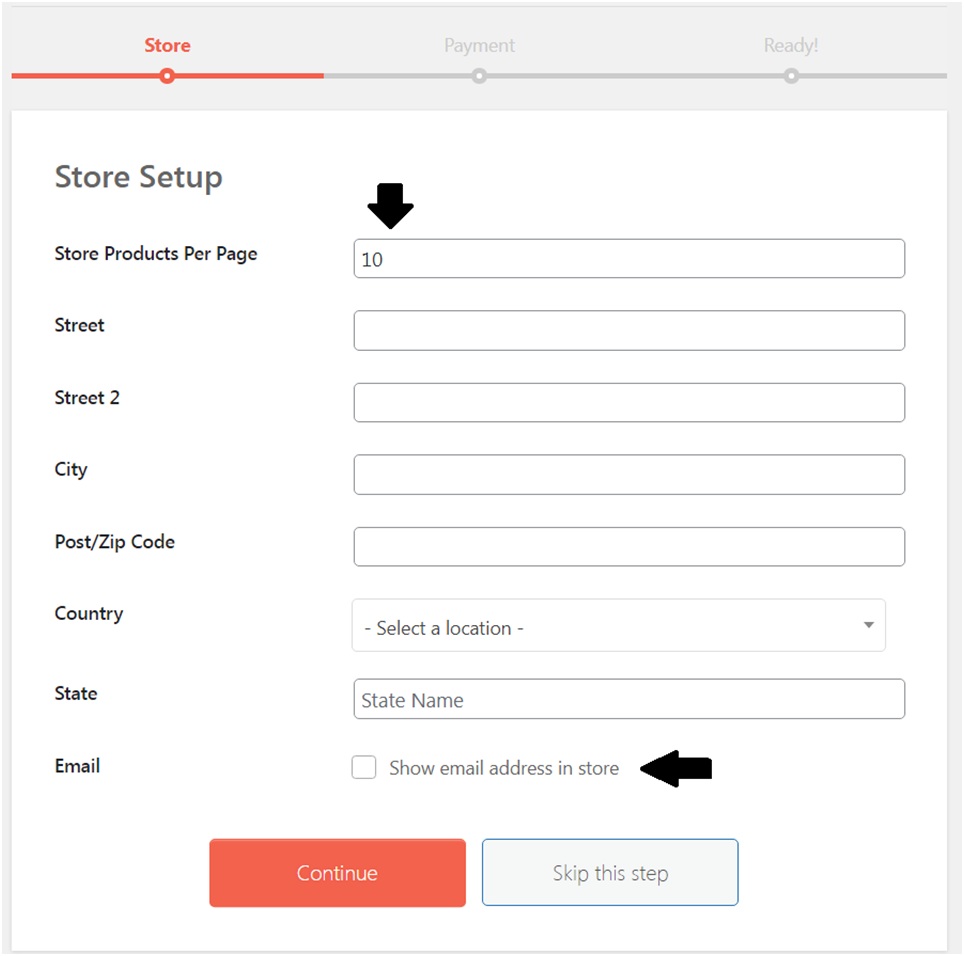
- Simply click on let’s go. It will open the below page for entering the detail of your Store. The first option is to enter the detail of the first option is to enter the detail in the “Store Product Per Page” option. This option shows how many products do you wish to put on your page. If you select 10, it will display 10 products. If you do not have 10 products, add the number of products you can sell like 3 or say 7.
- Enter your address in street 1 and Street to options. Then enter your city, post/zip code, country, select your state name.
- If you want your email address to be displayed on your Store, click on the “Show email address on Store” option. If you don’t want to display your email on your store, leave it as cities and click on the Continue button to move to the next step.
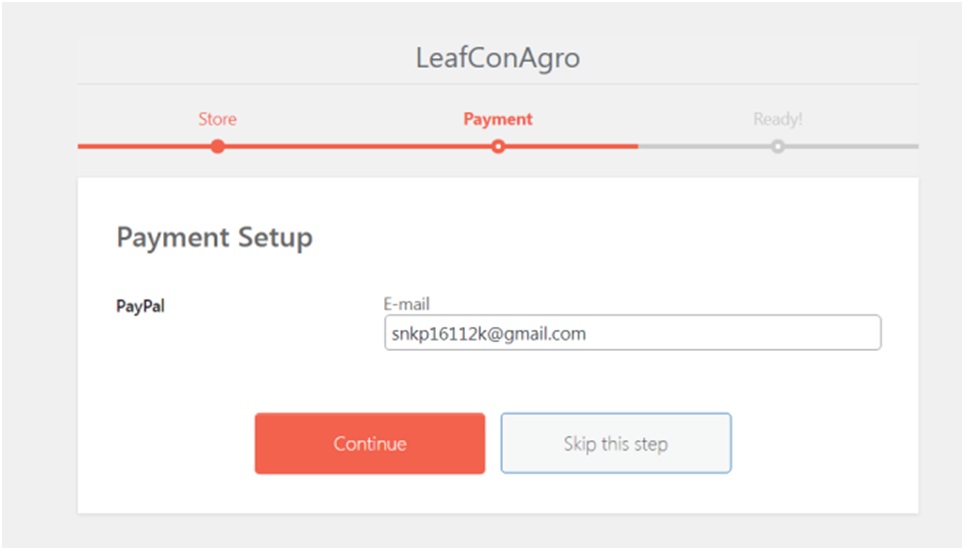
- On the process bar, you will be taken to the PAYMENT option where you have to select the email address for your PayPal account. Enter the email address you are using in your PayPal account. If you are not using PayPal for monetary transactions, then first you have to create your PayPal account.
- If you want to skip this step entirely just click on skip this step.
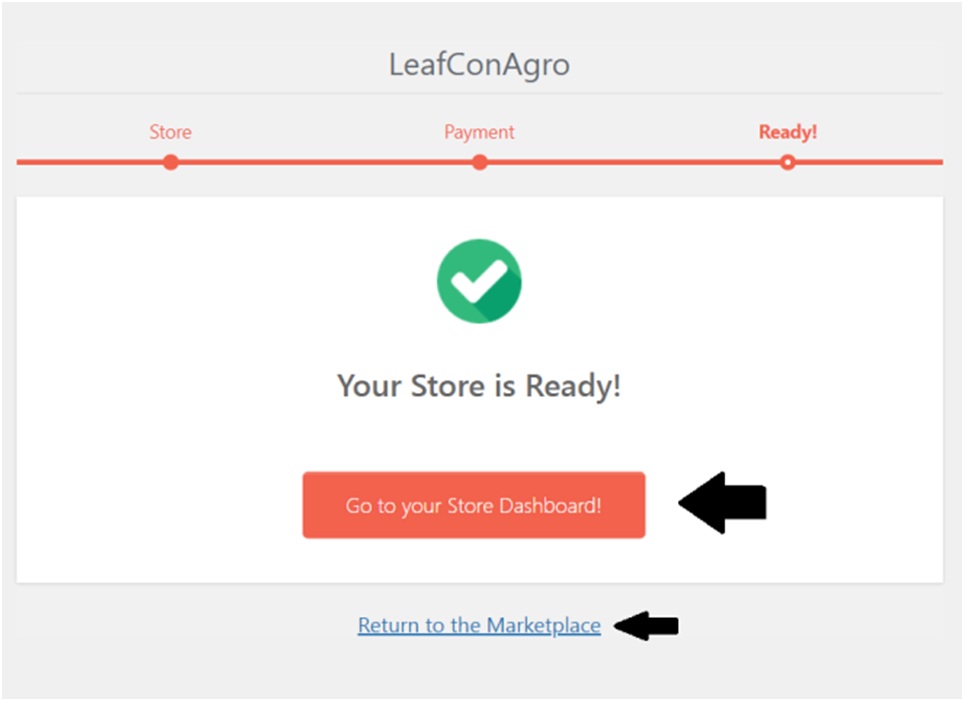
- Once you click on either of the options, you will see a message your store is ready as given in the image below.
- You will have two options, 1) Go to your Store Dashboard or 2) Return to the Marketplace. If you click on Return to the Marketplace option you will be redirected to the homepage of the Leafcon Agro portal.
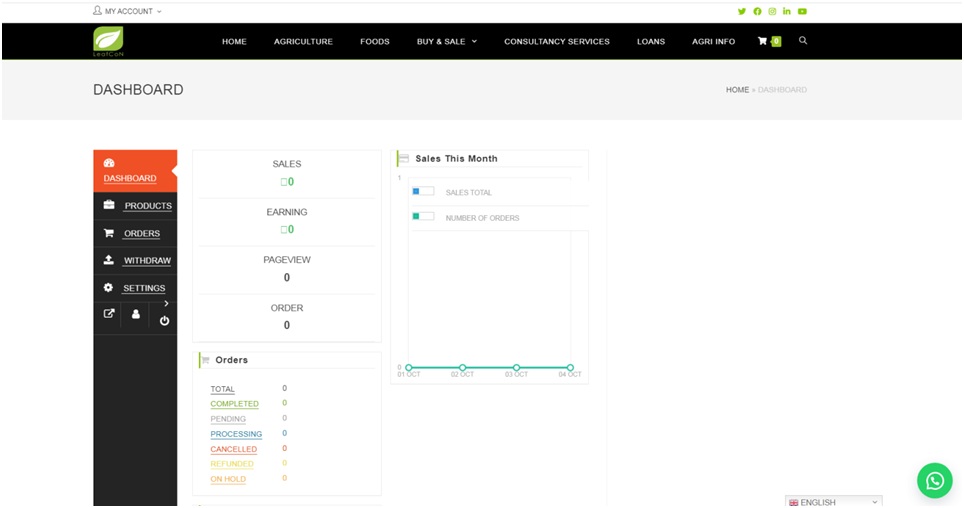
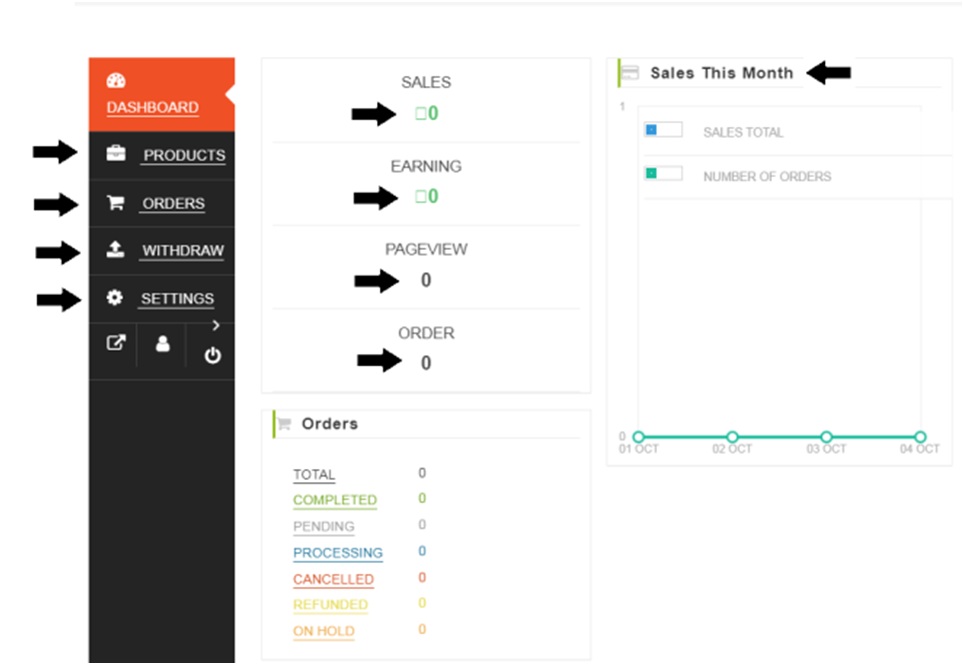
- If you click on go to your dashboard option when you will be redirected to your dashboard very can see your product, orders, your withdrawal status, your setting button and the overall status of your account.
- Sales show how much sales is done.
- Earning shows how much you have earned.
- Page view shows how many people visited your page.
- The Order shows how many orders you have.
- Just decide there is a graph showing your sale and number of orders.
- If you see below on the order section, you will be able to see the total, completed, pending, processing, cancelled, refund date and on-hold orders. With this option, you can easily track where you are and plan where you want to go.
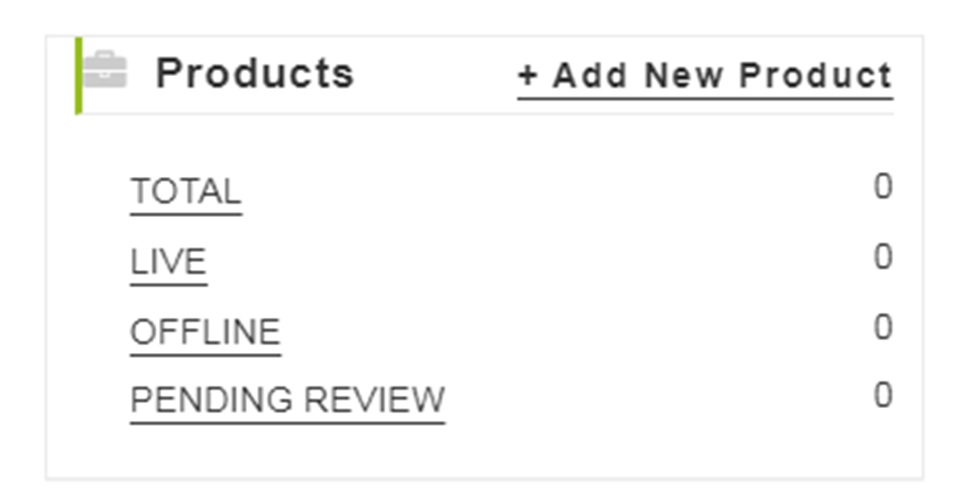
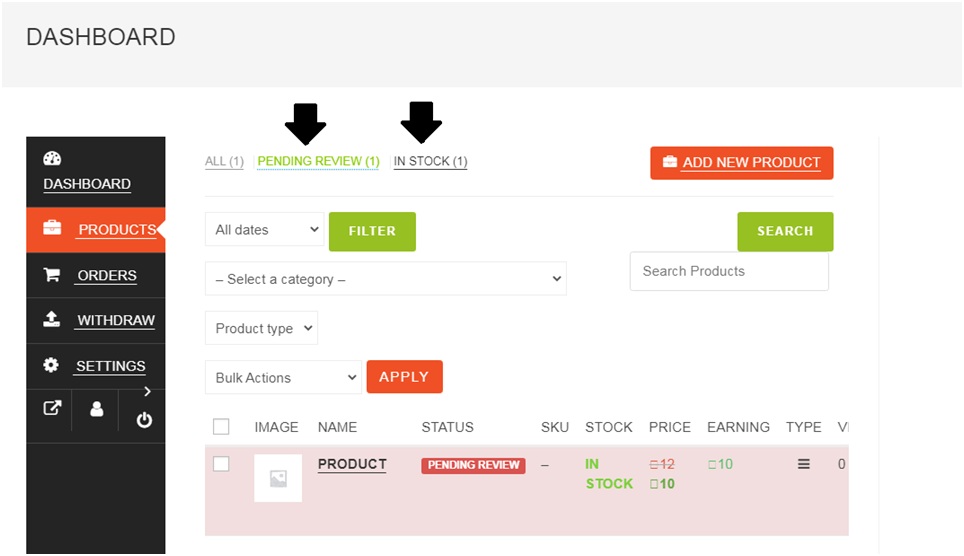
- Below there is another option called Products. It shows the total products you have, the products which are live on the portal which means there are active products. Offline shows the products which are offline which means they are not active. Pending review shows the product which is requested for approval.
- You can also add new products by clicking on the option +Add New Product to your Store.
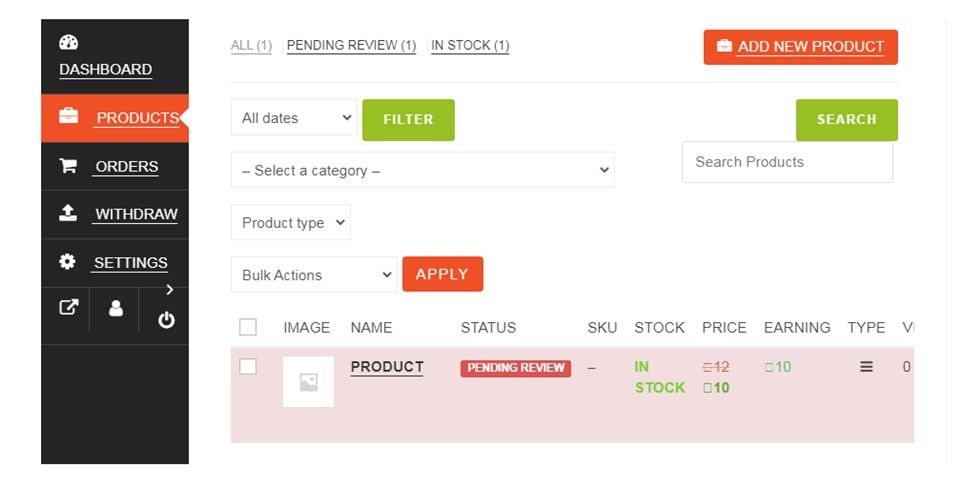
- If you select the Product option available on your dashboard, you will be able to see the product you will add. If this is the first time for you, you will be able to see the below screen on your device.
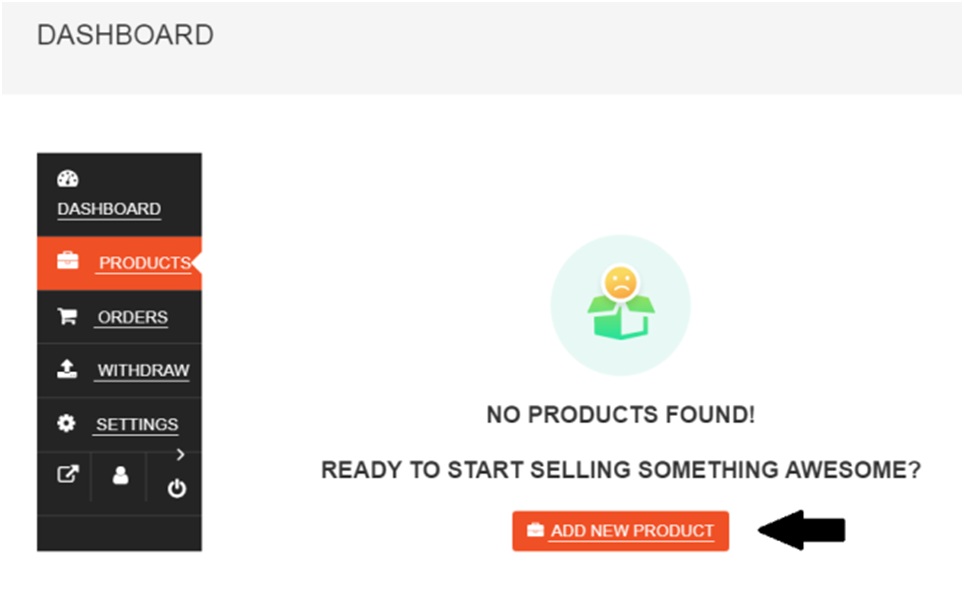
- To add the product for the first time you need to click on ADD NEW PRODUCT option.
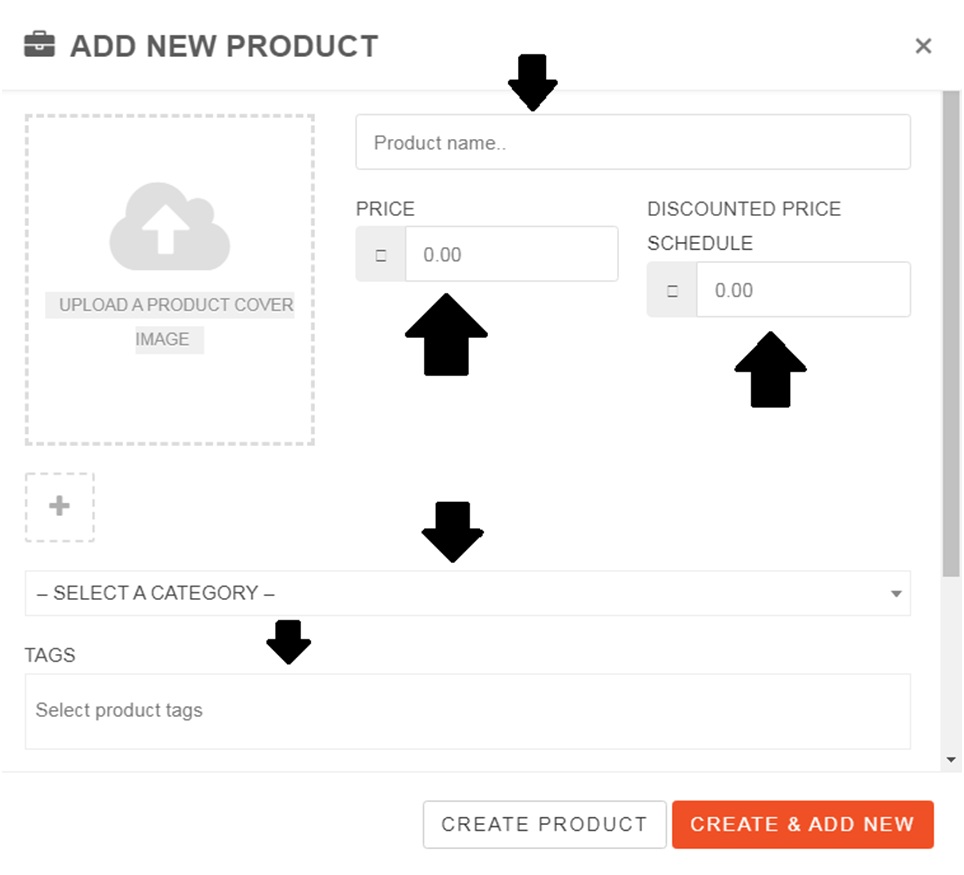
- A separate window will open called ADD NEW PRODUCT,
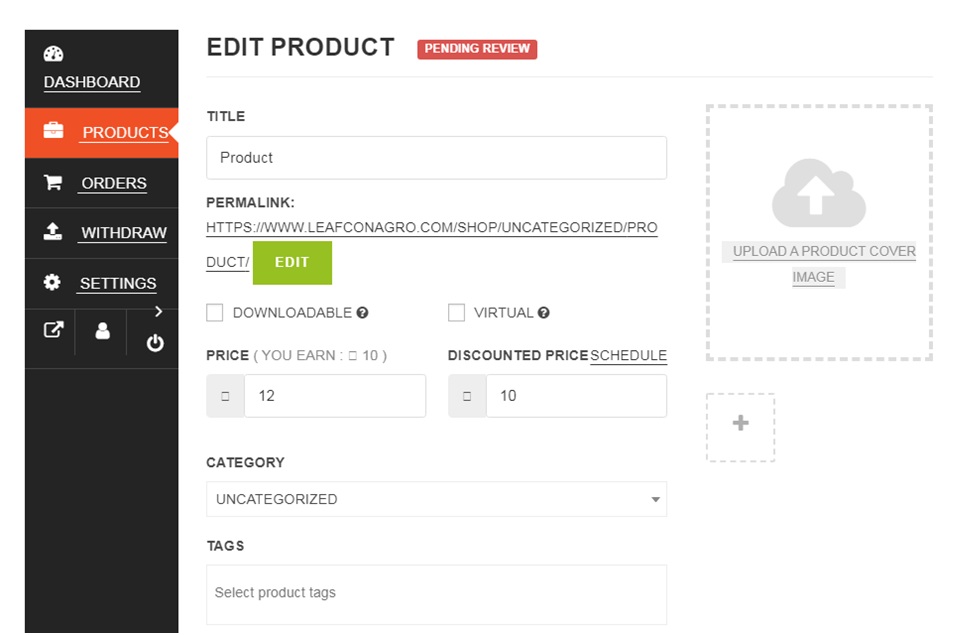
- Enter the name of the product that you want to sell in the Product Name section. Thereafter at the price at which you want to sell in the PRICE section. If you want to schedule your discounted price you can also add in the DISCOUNTED PRICE section.
- Then select the right CATEGORY from the drop-down menu and at the right the to your product so people can find your product easily.
- Then add the right image to your product, if you want to add more images simply click on the Plus sign to add gallery images.
- Then click on Create Product option.
- To edit the product you have just added, click on the PRODUCT tab right below the DASHBOARD.
- When you select the product option you will have a window on your screen where there are certain options given like FILTER, SEARCH, category, Product Type and option for bulk action. Use option as per your requirement.
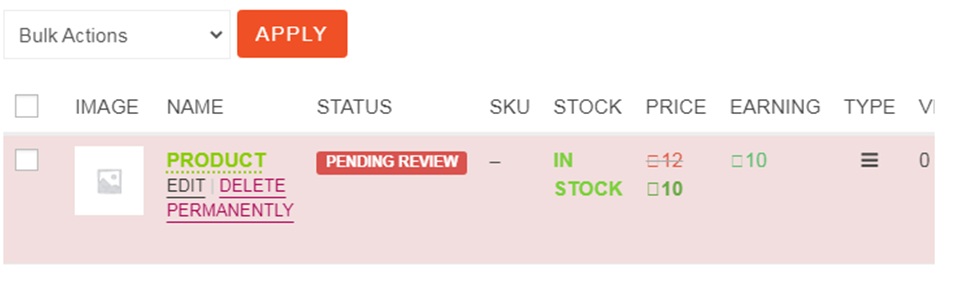
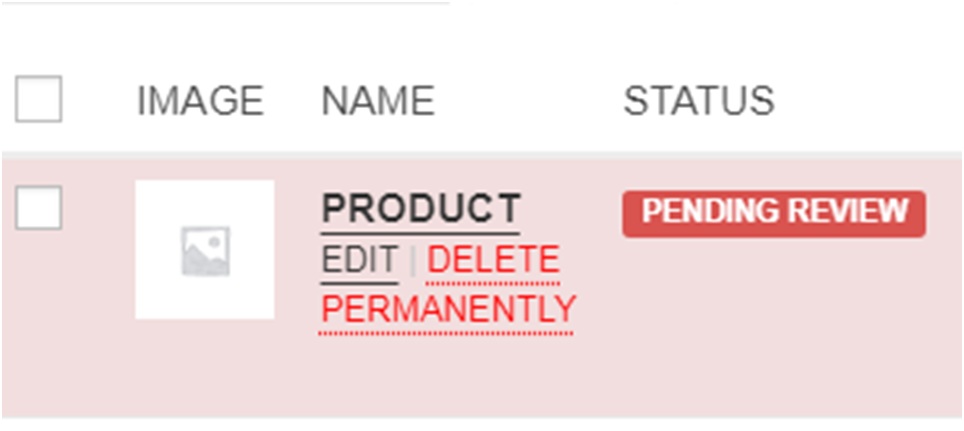
- When you write the pointer on the product option you will have the “EDIT” and “DELETE PERMANENTLY” options as displayed below.
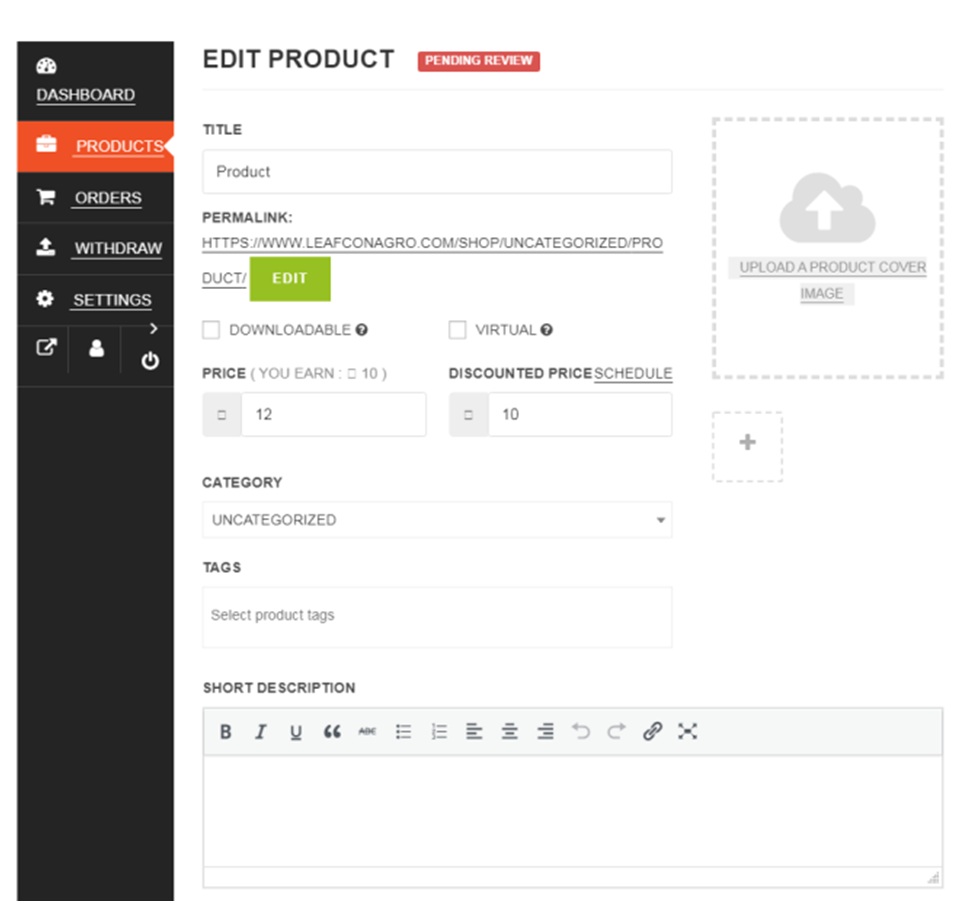
- You can click on EDIT to edit the detail of the product you added. So when you click the EDIT option, it will open options to edit your product details. You can change your product title, you can check out the option like downloadable and virtual.
- One below those options you have PRICE and DISCOUNTED PRICE options available. You can schedule discounted price as well setting the right dates. You can add tags as well so people can find your product with related queries.
- Also, you can write a SHORT DESCRIPTION about your product and DESCRIPTION of your product as well.
- You can add inventory for your product as well. For that, you need to use two options which are SKU (STOCK KEEPING UNIT) and STOCK STATUS. SKU means the quantity of your product and stock status means if your product is “In Stock”, “Out of Stock” or “On Backorder”, select the option that is suitable for you.
- You can also ENABLE PRODUCT STOCK MANAGEMENT. You can also limit the buying quantity per order to only one as per the given option.

- You can check out OTHER OPTIONS as well. You can add PRODUCT, STATUS VISIBILITY and PURCHASE NOTE and lately you can ENABLE PRODUCT REVIEWS.
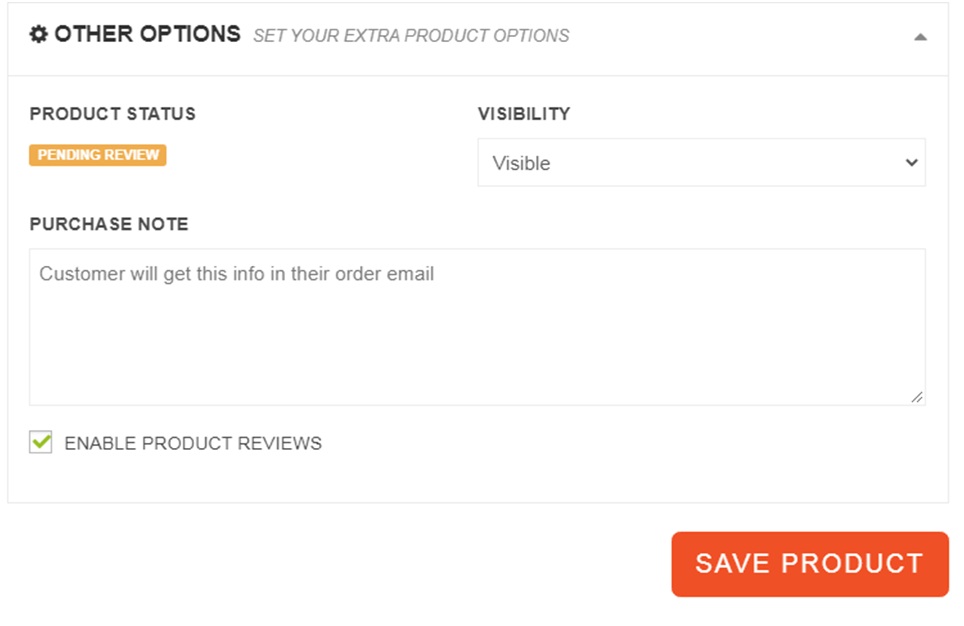
- You can save all the changes by clicking on the SAVE PRODUCT option.
- You can also use the DELETE PERMANENTLY option to delete your current edit product.
- You can also check out the PENDING REVIEW and IN STOCK option on your DASHBOARD when you click the PRODUCT option
Your product will be reviewed by our team and if your product is selected, it will be approved for selling.
Orders
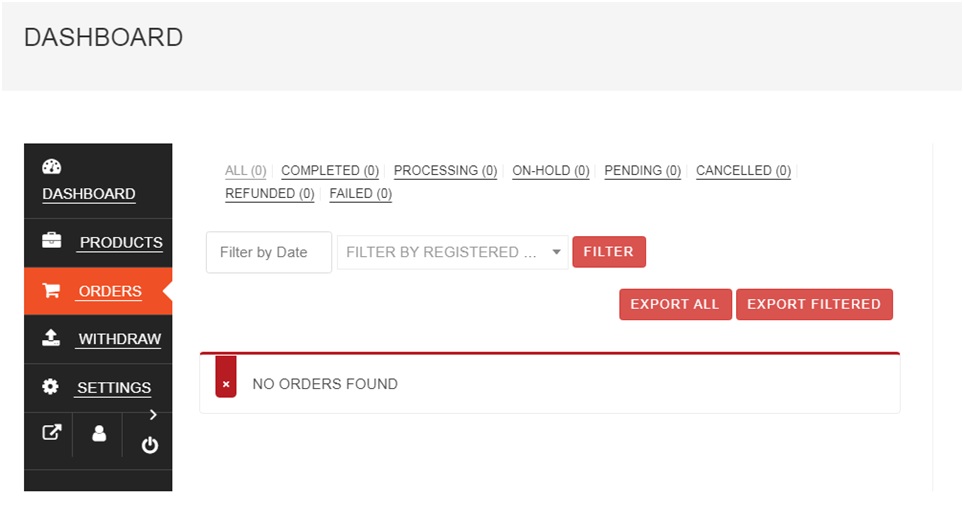
- In the ORDER section, you will find that there are many options for you to explore. You can also use a filter to find the accurate data that you’re looking for.
- You can check out our WITHDRAW option which will be helpful to see the CURRENT BALANCE, MINIMUM WITHDRAW AMOUNT, WITHDRAW THRESHOLD and WITHDRAW REQUEST, APPROVED REQUEST and CANCELLED REQUEST.
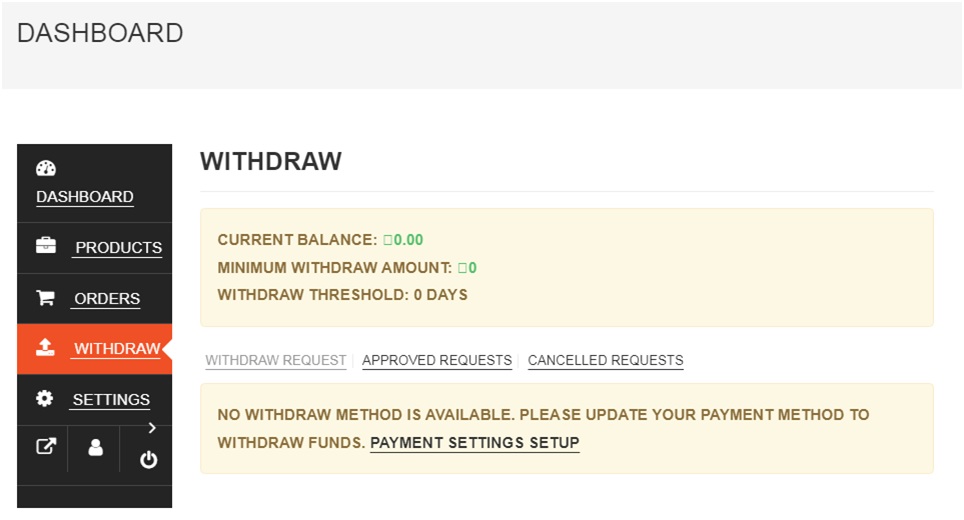
If you have not set up any withdrawal method then update your payment method to withdraw funds by clicking PAYMENT SETTING SETUP.
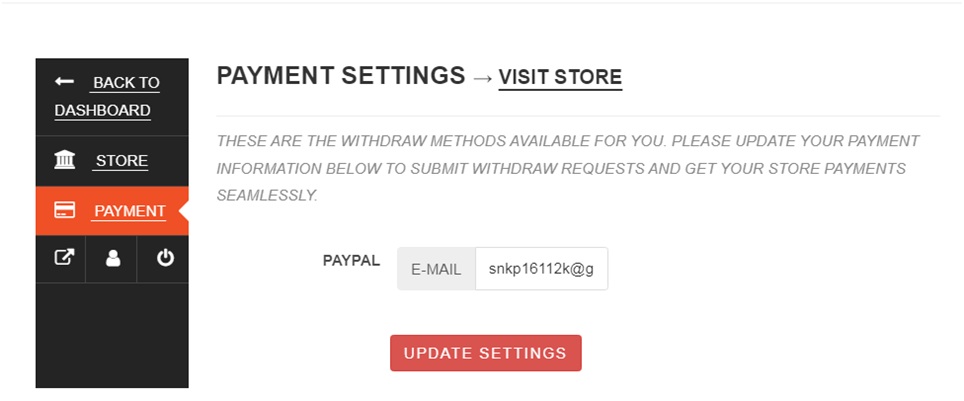
If you click on payment setting setup, dual open a pain where ask your Paypal email. If you did not update your payment for your PayPal account, you can also do it from here.
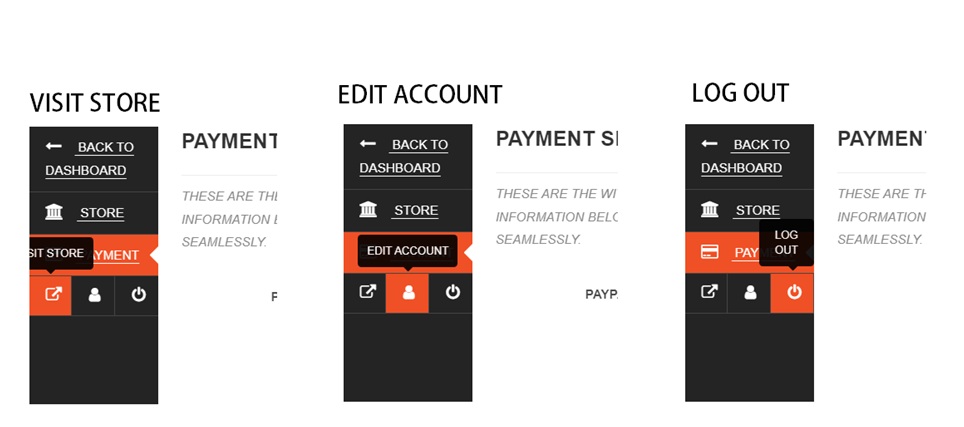
On the DASHBOARD. You will have three other options below the PAYMENT option like visit the STORE, EDIT ACCOUNT and LOGOUT as given below.
Billing
On your Vendor DASHBOARD, click on the ORDERS option to see the order details. You will be able to see the numbers of orders with their details like ORDER, TOTAL, EARNING, STATUS, CUSTOMER, DATE AND ACTION.
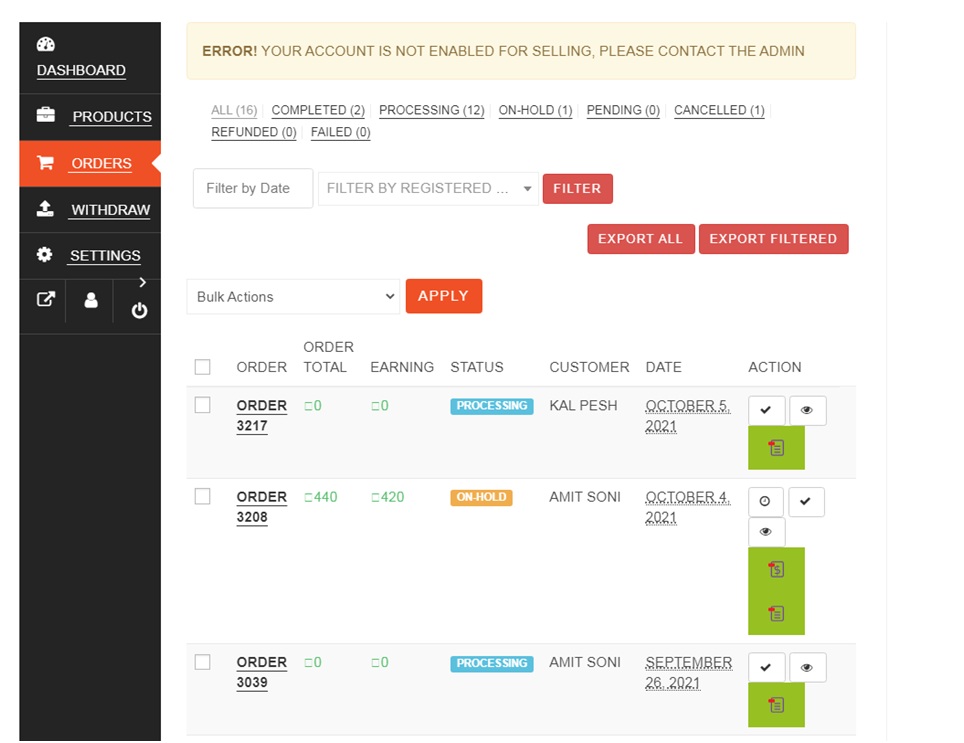
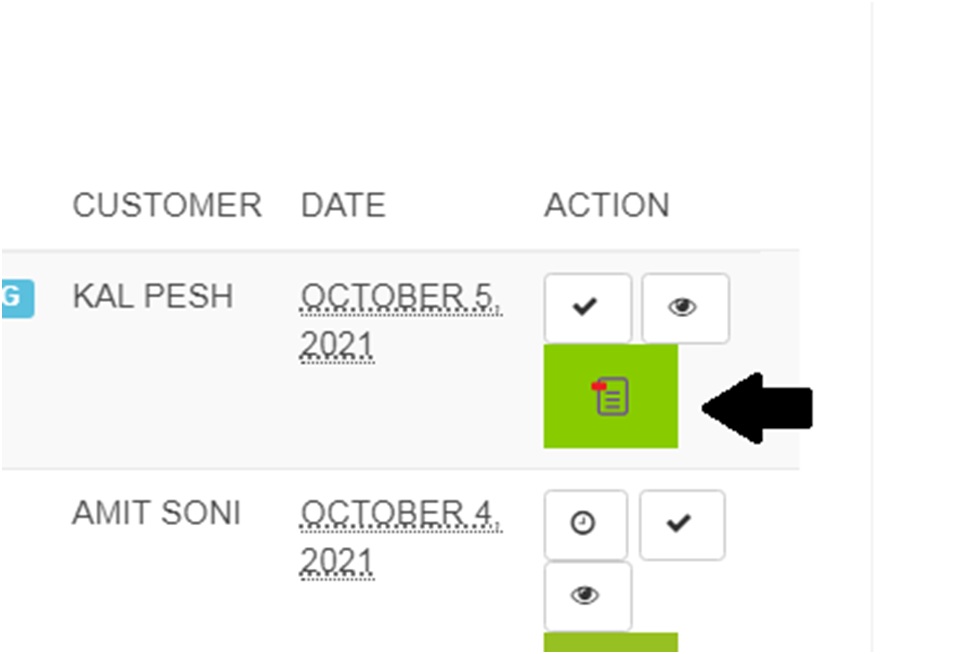
- To see the building or bill detail you need to go to the action tab and click on the document logo as shown in the picture below
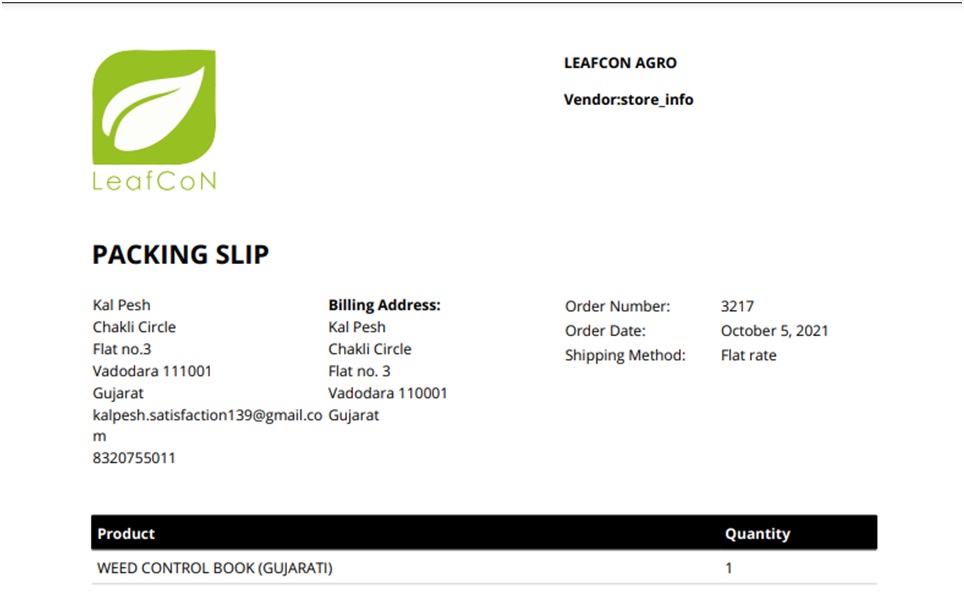
- By clicking that logo, you will be able to open the Packing List for the order you received.
Complete Order Confirmation
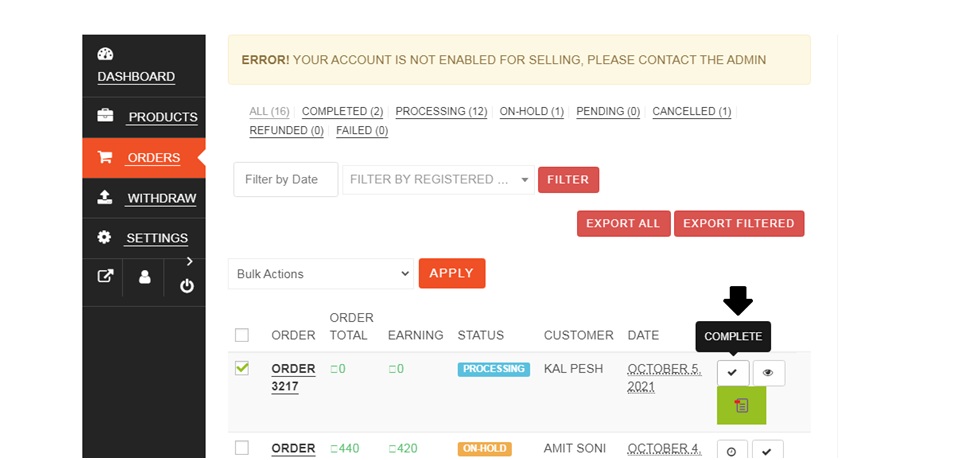
- To accept your order you have to click on the correction symbol so you can confirm the order of your customer.
- You can use the export all and export filtered option to download the CSV file to your device which can be used to see your order details and is useful for comparison and other purposes to promote your business growth.

Shipping
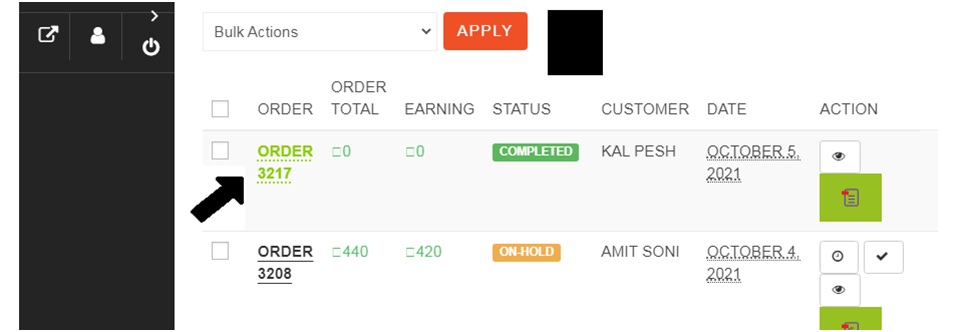
- You need to click on the order number as given in the picture below
- Once you click on that, you will have a separate page opened for you showing you the details like ORDER NUMBER, ORDER ITEMS, GENERAL DETAILS, BILLING ADDRESS, SHIPPING ADDRESS, ORDER NOTE and other details. Just go below and you will see the TRACKING NUMBER button.
- If you click on TRACKING NUMBER, you will have the below details shown to you.
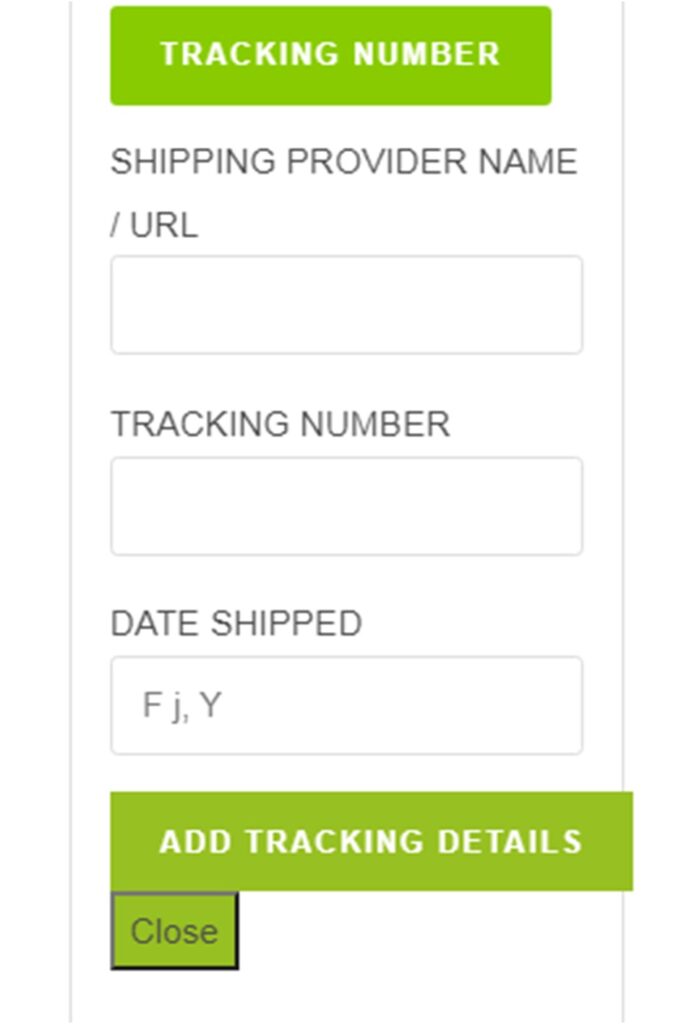
- Just fill in the necessary details you have from your shipping provider like SHIPPING PROVIDER NAME/ URL, TRACKING NUMBER and DATE SHIPPED.
- Click on ADD TRACKING DETAILS
Tracking Update
Tracking details will be automatically provided by the Shipping Provider and you will not have to worry about the tracking details. Since you will be providing the customer or buyer with the third party link for tracking, he will be able to see the updates provided by the Shipping Provider.
Return and Refund Update
When the customer returns the product and requests a refund, you will get a notification from our website. You will have to accept that request from the customer and proceed with return and refund as per our Return and Refund Policy.
You will get all the details in your email about the order, request for return and refund and any other updates that come to our website. The purpose of this is you will get notified regularly.